Anatomy Lab Tests
A simple way to study in anatomy lab
There is a simple strategy you can use to succeed in anatomy lab and score the grade you want on the anatomy practical. Think through what you would do if you had to write the lab practical for your course. What questions would you ask and how would you set it up? Designing a lab exam is problematical. All instructors want their students do well on their lab practical. Yet, often students complain that the tests are ‘tricky’. How tricky would you have to be setting up the exam with the resources available? Or, could you label the models in a less tricky fashion?
Anatomy study tips
Step 1: Look around – what to use for test questions?
Having designed my share of lab practical exams, here are some things I would like to share. There are about as many ways to teach and test in an anatomy lab as there are anatomy instructors. Most instructors are limited by the equipment and the models that are on hand.
What is available for your course? Do you have charts, plastic models, an articulated skeleton, microscopes, glass slides? Or, do you view your tissue slides on electronic boards? Where can labels be put that touch only a distinct body part? Do you get to perform dissections of animal bodies with your own hands? Or are you shown videos of dissections?
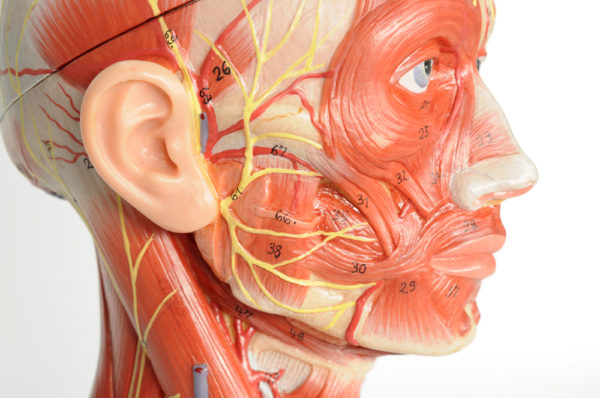
Whatever is available to your lab for study is considered fair game for creating questions. If your lab has a model labeled like the illustration above, it would probably be a good idea to know the names that go with the numbers. Better yet know how each of those body parts function, what does it do?
Remember that muscle, nerve, blood vessel names have meaning. They can be translated from the Latin to descriptive words that are familiar to you. It is much easier to remember them when you understand the descriptions. And the descriptions tell you what they do.
Step 2: Be there for all lab sessions
The only way to read your instructor’s mind about what may appear on your lab practical is to show up when the instructor is there. There are usually so many possibilities for questions that most instructors will try to lead you toward what they think are the key items you should know. Watch closely and listen during demonstrations. If you don’t understand the point that is being made, say so. Better to ask a simple question than to appear to be dreaming about something else.
For which laboratory projects are you provided the most help? Is part of your grade going to reflect whether you jump in and try things for yourself? Is part of the grade going to be a reflection of how well you work in a team with the other students? If you do not know, ask your instructor. Don’t guess! Your lab participation will probably be a significant part of your lab grade.
Step 3: Study the main body parts – do not try to learn all human anatomy
If you are headed for any kind of medical training, now is the time to really focus upon getting right and left body parts clear in your mind. It will continue to come up. Get in the habit of naming the parts of the appendages as right and left. Be able to identify the difference between a male and female pelvis.
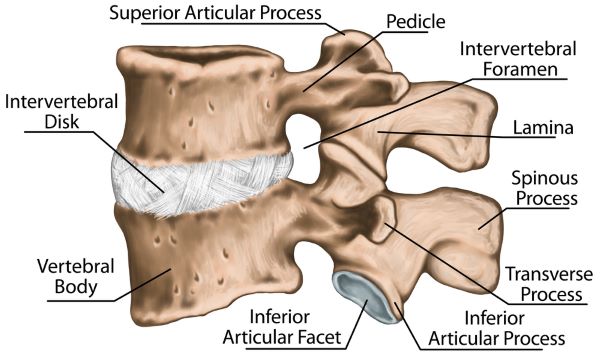
Pay attention to the shape and parts of each vertebra. Shape reveals where in the vertebral column each is found. Where in the vertebral column would the two below be found? What is there about a vertebra that tells you its location? What special function does each type support?
Few instructors insist that you learn the name of every human muscle, nerve and blood vessel. So, get a list from your instructor of which you need to know. The list of muscles used in most anatomy courses usually includes the larger and easier to find muscles rather than the small deep muscles. Focus your study on the origin and insertion of the largest muscles on the list. Figure out what is meant by ‘origin’ and ‘insertion’ of a muscle.
Also notice that muscles are named for the bones to which they are connected, and for the movements they create. Actually, by the time you finish your anatomy course, you will recognize that sectors of the body are named in sets. The names of the muscles follow the names of the bones as do the blood vessels and nerves.
Step 4: Look for patterns in the tissue under the microscope
For many this is the hardest part of anatomy lab. Getting a tissue section into focus under the microscope is a challenge. Then it is hard to recognize parts of the tissue without help from someone who already knows them. Do not feel bad that you cannot immediately see what you think must be there.

Tissue slide on microscope stage. Focus in on what your need to see for anatomy practical, Sven Hoppe/Shutterstock.com
Even as Director of Research in my own laboratory, I often needed to enlist the help of a pathologist to understand what I was seeing in a specific tissue. Now there is a pathologist, Dr. John Minarcik, who has placed a wonderful series of videos on YouTube to help us all understand tissue sections learned in anatomy lab. To find a list of Dr Minarcik’s short videos, go to the page on this site titled Human Tissue Histology by clicking here. They are short and you will be surprised by how much they help.
Step 5: Cadaver dissection – proceed cautiously
If you are to do cadaver dissection (or animal dissection) with your own hands, treat the body of your cadaver with respect. This was once a living creature who will now share with you the beauty of how its body is organized. Muscles will probably be dissected first, and they are held together by tough tissue named fascia. It is better to pull apart the connective tissues around muscles than to cut at random with a knife or scissors.
Cadaver muscles are never as distinct as shown in plastic laboratory models or in the pictures of your book. In fact actual muscles tend to be finer and flatter. They will separate cleaner and tear less if you tease them apart with your fingers.
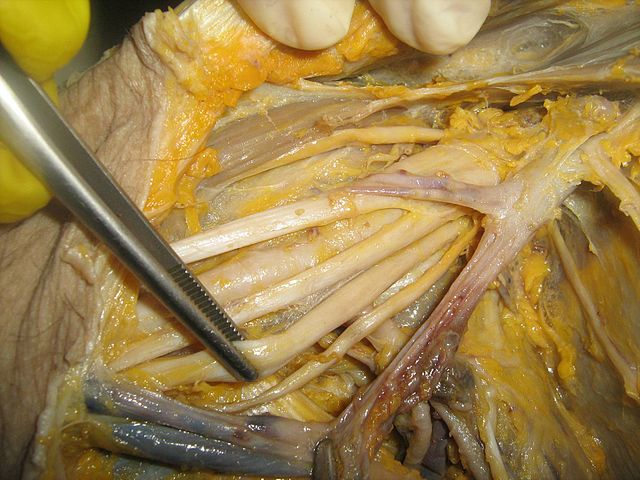
Remember also that the blood vessels and nerves run in vascular bundles together through the muscles. If you become careless with the scissors blood vessels and nerves may no longer be there when you need to find them. Nerves will appear to be white strings in the tissue, like those in the forces in the image. Blood vessels and nerves run together in vascular bundles. Look for the blood vessels in the image.
Most Important!
Discover the part of the information that your instructor hopes you will learn by asking questions. Your instructor’s response to your questions will provide strong hints about how likely that aspect of anatomy will appear on the anatomy practical. Even medical specialists do not know every part of the human body in precise detail. A medical doctor who is an expert at hip joint surgery will spend little if any time studying the latest techniques for heart surgery.
Once you become aware of the specific anatomy you need to study, try to prepare some questions about it yourself. How would you select the most important items for testing? I hope these suggestions help you get past the nervousness that the anatomy practical causes. You may also find information on the following posts and pages helpful.
Further reading:
Human Tissue Lab Practical Exams
Muscle Origins, Insertions and Levers
Do you have questions?
Lab exams cause great anxiety. If you have more tips that have helped you to score high on anatomy lab exams, please share them by leaving a comment or send me an email at DrReece@MedicalScienceNavigator.com. I read and reply to all comments and email.
If you find this discussion of how to score well on A&P lab exams helpful, share it with your fellow students or send it to your favorite social media by clicking one of the buttons below.
Margaret Thompson Reece PhD, physiologist, former Senior Scientist and Laboratory Director at academic medical centers in California, New York and Massachusetts is now Manager at Reece Biomedical Consulting LLC.
She taught physiology for over 30 years to undergraduate and graduate students, at two- and four-year colleges, in the classroom and in the research laboratory. Her books “Physiology: Custom-Designed Chemistry”, “Inside the Closed World of the Brain”, and her online course “30-Day Challenge: Craft Your Plan for Learning Physiology”, and “Busy Student’s Anatomy & Physiology Study Journal” are created for those planning a career in healthcare. More about her books is available at https://www.amazon.com/author/margaretreece. You may contact Dr. Reece at DrReece@MedicalScienceNavigator.com, or on LinkedIn.
Dr. Reece offers a free 30 minute “how-to-get-started” phone conference to students struggling with human anatomy and physiology. Schedule an appointment by email at DrReece@MedicalScienceNavigator.com.


Comments
Anatomy Lab Tests — No Comments
HTML tags allowed in your comment: <a href="" title=""> <abbr title=""> <acronym title=""> <b> <blockquote cite=""> <cite> <code> <del datetime=""> <em> <i> <q cite=""> <s> <strike> <strong>